
This article is about how to create a website on Showit.
What is Showit?
Showit is a drag-and-drop design platform for creating unique and stunning websites without learning to code.
01. Why Choose Showit for Your Website?
I chose to design on Showit because of the design freedom! I love website design, and with Showit, I have total freedom to create whatever I like.
So can you.
If you can dream of it in terms of website design, you can build it on Showit.
Overview of What We’ll Cover in This Tutorial
In this blog post, we will cover how to create a Website on Showit and optimize it for SEO, how to use Showit overall, and what to do after launching your website.
02. Getting Started with Showit
When starting with Showit, there are a few housekeeping items to take care of. First, let’s set up your account for success.
Ready?
Let’s go!
Setting Up Your Showit Account
After you’ve chosen your Showit subscription, you can start by adding the most relevant information.
Start with adding everything you need to fill out in the site settings.
Then, add your Google Analytics measurement code.
Lastly, add your social media accounts.
Navigating The Showit Dashboard
Navigating the Showit dashboard is SUPER easy. You have the left toolbar with sections as follows:
- Pages
- Blog Pages
- Site Canvases
- Canvas Sets
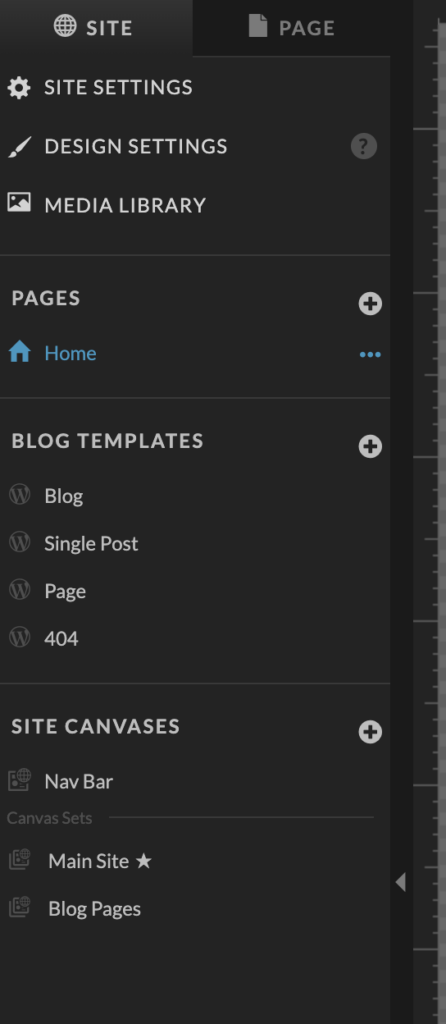
Pages are self-explanatory. These are all the pages on your website. Blog pages are the pages connected to your WordPress blog.
PRO INFO: To have ANY blog post appear on any website page, you’ll have to convert the page into a Blog page.
Understanding The Showit Canvas
Showit has a few types of Canvases.
- Site Canvases
- Page canvases
- Canvas Sets
Site canvases are simply the canvas on all your Showit pages. The nav bar and footer are usually site canvases.
A Page canvas is the pages you create. Home, about, work, etc… These are only specific to the pages you add the age canvases to.
Canvas sets are a set of Site Canvases that you can apply across select pages.
03. Choosing Your Template
There are so many amazing Showit templates to choose from. I hope this will help you decide which is best for your business.
Factors to Consider When Selecting a Template
You need to know a few key things when choosing your website template.
Things to Consider When Buying a Showit Template
- UX Design( is the template user-friendly, or is it overly designed?
- Is it mobile-optimized?
- Does it have all the necessary pages that are relevant to your business?
- Price
How to Import and Apply a Template to Your Site
Showit has made adding a new template to your website very simple. All you need is a “shared design key.” This key will have numbers and letters, and you can follow the three steps to add it to your Showit website.
4. Customizing Your Template
When you want to customize your Showit template, you have many options on what you can do.
You can change font styles, create shapes, add images, change the branding, and more.
Overview of Showit’s Customization Tools
Here is an overview of Showit tools for customizing your Showit template.
Modifying Layouts and Page Structure
To modify the canvases, you can drag the sidebar up and down, making adding the size you want easy.
Adjusting Colors and Fonts to Match Your Brand
To adjust fonts and colors for your brand, click on the design settings. To change the colors, add new hex codes. For fonts, you can upload custom fonts to match your brand.
05. Creating and Organizing Your Pages
Before you start building your website, it’s good practice to design your site structure or your sitemap. You want to plan out all the pages that you will need. I like to do my sitemaps on Figma, but you can use mind-mapping tools or even Figjam.
Setting Up Your Site Structure
When setting up your site structure, you want to ensure everything makes sense. Also, always think about your customer or end user. Who is your customer, and what is their main goal on your site?
Is it to book a call?
If it is, make it super clear and easy for them to find where to book the call with you.
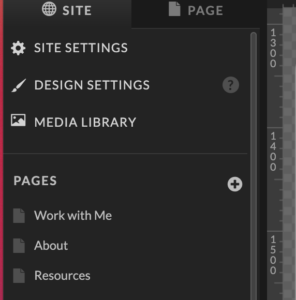
Creating New Pages
When you want to create new pages on Showit, you just have to click this little plus icon. Alternatively, you can use existing pages and duplicate them.
Organizing Your Navigation Menu
When you design your nav bar, you want to think again about your end user. What is their main goal on your site? Is it to buy a product? If it is, make sure they can easily buy it. And especially with the product page, make sure it isn’t nested deeper than three layers in your navigation. You can read about this more on Backlinko.
06. Designing Your Homepage
When designing your homepage, you need to consider a few things.
Key Elements of an Effective Homepage
When a potential client lands on your website homepage, you need to be able to tell them instantly what you do, who you are, and, most importantly, what you can do for them. If you can nail down these key things, you are off to a great start.
You want to consider your homepage as one long value proposition for your clients and customers.
Here is a sample outline of what sections I would include in a high-converting homepage.
High-Converting Homepage Outline
1. Hero Section
- Attention-grabbing headline
- Subheadline explaining your unique value proposition
- Call-to-action (CTA) button
- Eye-catching visual (image or video)
2. Social Proof
- Client logos
- Brief testimonial or trust indicators
3. Problem Statement
- Identify the pain points your target audience faces
4. Solution Overview
- Introduce your product/service as the solution
- Highlight 2-3 key benefits
5. How It Works
- Step-by-step breakdown of your process or product usage
6. Features and Benefits
- Detailed list of features
- Corresponding benefits for each feature
7. Showcase
- Portfolio, case studies, or product examples
8. Testimonials
- Detailed client success stories or product reviews
9. About/Team Section
- Brief company history or mission statement
- Team highlights (if relevant)
10. FAQ
- Address common questions or objections
11. Call-to-Action
- Repeat your primary CTA
- Reinforce the value proposition
12. Blog/Resources Preview
- Showcase recent blog posts or valuable resources
13. Newsletter Sign-up
- Encourage visitors to join your mailing list
14. Contact Information
- Make it easy for visitors to get in touch
15. Footer
- Navigation links
- Social media links
- Legal information (Privacy Policy, Terms of Service)
Use this homepage outline as a general guideline to start creating a website on Showit.
Creating a Compelling Hero Section
Your hero section is the first thing people see when they land on your website. One of two lines of content should say what your website is about. Keep it simple, to the point, and concise.
07. Crafting Your About Page
Your about page should do a few things. Tell a story about who you are, how you came to do what you do, and how you can help your readers, clients, and customers with a CTA(call to action) or actions sprinkled throughout your About page.
Telling Your Story Effectively
Try to tell your story in a way that leads to how you can help your clients now. I know this is not an easy task. The most difficult page for me to write was my About page, mainly because I hate talking about myself. I’d rather talk about what I know and how to help someone.
But if you outline your about page and then tell a story with a beginning hook, middle, and end where you want the user to go, this is a good place to start. Plus, remember that you can always improve it.
Incorporating Images and Design Elements
You add your image, and your photos are clear and good quality. You can also add fun elements. A super popular design trend right now is adding scribbles and hand-drawn icons.
Creating a Connection With Your Audience
Connect with your audience by telling a real story highlighting your wins and struggles. This will build trust and allow people to relate to you more.
08. Building a Services or Products Page
There are several ways to sell products on your Showit site.
- WooCommerce
- Shopify Buy Buttons
- Linking a Shopify store in your Navigation and Footer as a link
- Thrivecart
- Kartra
- Kajabi
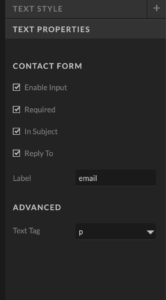
09. Designing a Contact Page
The easiest page to design on Showit will probably be your contact page. You can tweak a form you’ve already created on your home page. Make sure to check the form inputs so the form will actually work and be sent.
You can do this by adding text properties.
10. Implementing a Blog (Optional)
If you want to blog, you’ll need a Showit blog subscription. Once you set up the subscription, Showit will connect your Showit account to WordPress, which will take a few days. Once it’s done, you can start blogging.
Setting Up Your Blog in Showit
The way you set up your blog on Showit is to first create your pages.
You will need the following pages:
- Blog page
- Single blog page
- Category page
- Single-category template pages
These will be the blog page templates that you use on WordPress. You create the templates on Showit, and they will appear on WordPress.
11. Mobile Responsiveness
According to Statista, there were 7.1 billion mobile users worldwide in 2021, and this number is projected to reach 7.49 billion by 2025.
So, it’s vital and an absolute must that you ensure your website is mobile responsive. If it is not optimized for mobile screens, people will leave your website faster than Sonic can run.
Understanding Showit’s Mobile Editor
The mobile editor on Showit can be used in several ways. It can be used independently or on the mobile screen alongside the desktop editor.
You can also split up the editor on your right toolbar, making it user-friendly for designers to edit the mobile screen to look different from your desktop.
You can also toggle to show or hide elements on a specific canvas.
Optimizing Your Design for Mobile Devices
When optimizing your design for mobile screens, remember the following:
- The text needs to be at least 16-18px for legibility
- Fonts should be clear to see for legibility.
- Having margins on each side of the mobile screen is a good idea to provide white space and breathing room for elements.
- Images should be sized according to fit the new screen.
12. Integrating Essential Features
When you want to integrate some extra features into your Showit website, here’s what I would add.
Adding Social Media Links
Social media links are also easy to set up on your Showit site.
You can add them by going into your site settings and social.
Implementing Email Sign-Up Forms
For the email sign-up form, you can integrate email marketing platforms like Convertkit, Flodesk, or PDoW.
13. SEO Optimization in Showit
To optimize your Showit website, you need to do a few things on Showit’s side and a few others on WordPress. Let’s start with Showit.
Setting Up Page Titles and Meta Descriptions
You want to ensure you set up your titles and meta tags correctly. For your titles, you want each title to be set up in a hierarchical order.
Here’s what I mean.
- One h1 tag per page
- Most hedaings are h2 tags
- Headings in a section would be h3 tags.
- Paragraphs would be a p tag.
- Like big fonts, any decorative text would be up as a div.
This way, you know your titles are set up for SEO success.
For meta descriptions, you want to write what is on the page. Try not to stuff keywords, but create readable sentences with relevant keywords for that pesticide page, and you’ll be good to go.
Optimizing Images With Alt Text
Make sure you name images accordingly BEFORE uploading them to Showit. By the way, this goes to whatever website builder you are using. For example, when working with Shopify clients, I noticed that most clients didn’t name their mages.
This is a huge mistake because search engine spiders crawl the web and can read these, and they are one small part of your SEO plan that can help you optimize your site or products to be found in searches.
Other SEO Best Practices for Showit Websites
For best results, try running all your images through an image compressor for better load time. I like to use this one: compress PNG.
WordPress SEO
Since it’s related to my fellow WordPress bloggers who use WordPress with Showit to blog, I figured I’d add this section to help you set up the WordPress side.
For your blog, you have to add your SEO on WordPress. You can do this by using YostSEO or Rank math. Ive tried both. I like YoastSEO. I’m so used to it, and ive been using it since 2019.
Add your SEO plugin and all the information they ask for in each blog post, and you’re good to go.
14. Preparing for Launch
Before you launch, make sure to check a few key things. He is what I would check before I launch my client’s sites or my own.
Final Checks and Testing
Launch Checklist
- Links work
- Legal pages are done
- SEO is set up
- Pages load fast
- Different screen sizes
Connecting Your Domain
You can easily connect your custom domain to show it from any domain provider by following these simple steps.
- Go to your Showit site settings.
- Go to connect a custom domain.
If you’re having difficulty connecting your domain, I would open a chat with Showit and your domain hosting platform. This way, they can help you set it up.
Publishing Your Showit Website
Publishing your show it site is easy. All you have to do is hit publish.
15. Post-Launch Tips
Your work is not done after your launches; it is just beginning. Here’s what I would do for the post-launch tasks.
Monitoring Your Website’s Performance
You can monitor your website performance with Google Analytics Search Console, SiteKit plugin on WordPress, and Similar Web.
Continuing to Improve and Iterate on Your Design
A brand refresh is a good idea every few years, at least. Trends change, and getting a new vibe for your site is fun. So consider doing a brand refresh every few years.
Wrapping Things Up!
So that’s it for this post. Now you have learned how to crate a website on Showit.
Additional Resources
Helpful Showit Tutorials and Guides
Here are resources to help you learn more about Showit. You can also sign up for my Showit course, which teaches you how to use Showit, all the ins and outs you need to know, and how to design your first Showit website.
More Showit Blog Posts for You!
- Showit SEO: The Ultimate Guide to Improving Your Rankings
- 5 Easy Ways to Customize Your Showit Template
- The Ultimate Showit Guide: From Beginner to Pro